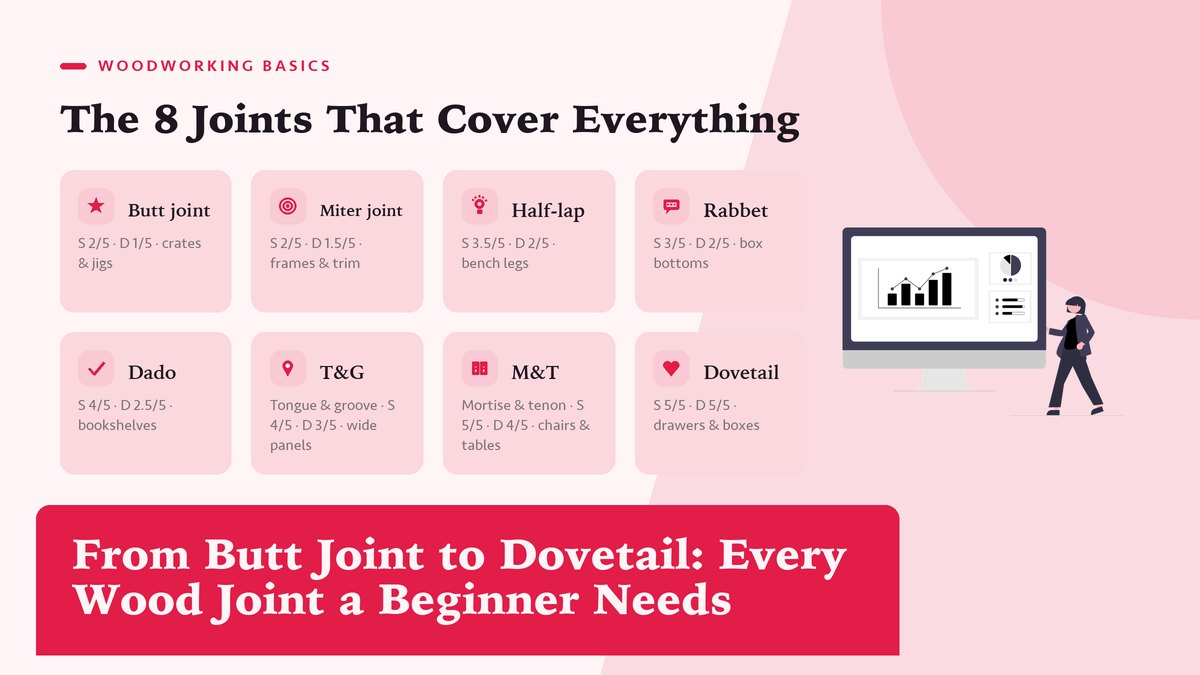
Eight joints cover almost everything you’ll build in your first five years of woodworking. Here’s an illustrated tour of each one: what it looks like, how strong it is, how hard it is to cut, and the minimum tools it demands.
The first time I tried to explain a dovetail to my brother-in-law, I held up two pieces of scrap pine and told him the wood was holding hands with itself. He nodded politely. Then I showed him a drawer where every dovetail was a slightly different size, and he got it right away. A joint is something you learn by cutting badly, then less badly, then almost right. Nobody’s first dovetail fits. Mine looked like a drunk staircase. But the joint still held that drawer together for two years before I remade it, which tells you something about how forgiving this craft can be when you pick the right joint for the job. This guide is the one I wish someone had handed me before I bought my first board. Eight joints actually matter. The rest you can ignore for now.
How to Read This Guide
Every joint on the list solves a specific problem. Two boards meeting end-to-end. Edges joining into a wide panel. A corner under load. Some joints lean on glue, some on mechanical interlock, some on screws or dowels. The ranking runs from easiest to hardest, though strength doesn’t always track difficulty. A well-glued half-lap will beat a sloppy mortise-and-tenon every single time. If you want the deep theory behind all of this, Popular Woodworking’s joinery techniques library is the reference I keep bookmarked. It’s full of the same wood science that explains why long-grain glue bonds end up stronger than the wood itself.
One more thing before we start. Every joint here assumes you’re working with lumber that’s done moving, because wood still loaded with moisture will crack whatever you build, no matter how clever the geometry. Big-box store lumber usually sits around 6 to 8 percent moisture and behaves fine. If you’re milling your own stock, I’d honestly grab an inexpensive moisture meter before investing hours in joinery. Ask me how I know. (Fine, I’ll tell you. A beautiful cherry box split clean across its lid the first winter I owned it, and I’ve measured every board since.)
The Ranked Tour: 8 Joints, Easiest to Hardest
Joint #1–#8 · strength and difficulty on a 5-point scale · tools = minimum viable kit
1. Butt Joint, the honest starting point
Two boards, cut square, glued end to end. That’s the whole thing. The butt joint is what you build your first bookshelf with, and there’s no shame in that. What matters is knowing its weakness. End grain drinks glue like a straw and gives the bond almost nothing to grab, so a plain butt-glued corner can be pulled apart by hand. Mine could. I tested.
The fix is mechanical help. A couple of countersunk screws through the face grain, or a handful of dowels, turns a butt joint from a liability into something that’ll outlast most furniture-store particleboard. This Old House has a solid woodworking library covering when screws beat dowels and when it’s the other way around. Short version, dowels look cleaner and screws hold harder in softwoods.
- Strength runs 2/5 alone, climbing to 3/5 once you add screws or dowels.
- Difficulty sits at 1/5. All you need is a saw, a square, and some clamps.
- First project would be shop jigs, a simple crate, or garage shelving.
2. Miter Joint, the corner that looks expensive
Cut both boards at 45 degrees and you get a miter, the classic picture-frame corner with no visible end grain. It looks like fine furniture, and that look is the trap. A miter is really a butt joint in a tuxedo, same end-grain gluing problem, only now the angle is harder to clamp and easier to open when the wood shrinks across its width.
My kitchen trim is all miters, and the two that opened up over winter are exactly the ones I glued without splines. The reinforced ones are still tight after three years. So here’s my beginner rule, and I hold to it. Always reinforce a miter. A biscuit or a glued-in hardwood spline costs you ten minutes and saves the corner. A miter saw makes cutting this joint trivial, and DeWalt’s miter saw lineup is what you’ll see hanging on most shop walls. That said, a handsaw and a $30 miter box gets you there too. Probably slower. Definitely quieter.
- Strength is 2/5 alone and 3/5 once you slip in a spline or biscuits.
- Difficulty lands at 1.5/5. Accuracy matters far more than effort here.
- First project means picture frames, box lids, small trays.
3. Half-Lap Joint, where real joinery begins
Cut away half the thickness of each board and they nest together flush. The half-lap is the first joint on this list where the wood itself carries the load, and you feel the difference right away. A half-lapped frame shrugs off racking that would fold a butt-jointed one flat. It’s forgiving too, because you sneak up on the depth with a few passes of the saw, test the fit, shave a hair more, and repeat until the two pieces drop together under a satisfying tap from your palm.
This is the joint I’d hand to any beginner who asks what to practice first. It teaches the two skills everything else builds on, sawing to a line and chiseling to a baseline, and you can cut it with a handsaw and chisel or with a dado stack on a table saw if you’ve got one. Woodworker’s Journal techniques section shows the variations with clear photos, the cross-lap, the end-lap, and the T-lap you’ll use in workbench trestles.
- Strength hits 3.5/5, since the glue area doubles and the grain stays continuous.
- Difficulty is 2/5. Saw, chisel, patience.
- First project could be workbench legs, a garden trellis, or face frames.
4. Rabbet Joint, the unsung hero of boxes
A rabbet is a step cut along the edge or end of a board, basically a half-lap that only involves one piece. Rabbet the ends of your box sides and the plywood bottom drops into them. Rabbet the back of a cabinet and the back panel sits flush instead of proud. It’s the joint that makes things look finished. And once your router bit or dado stack is set, a rabbet takes maybe ninety seconds to cut.
I rabbet the back of every cabinet I build, full stop. A quarter-inch-deep rabbet gives the thin back panel something to register against, hides its ugly plywood edge, and adds real stiffness to the whole case, which matters a lot more than it sounds when you’re shoving the thing across a room. If you’re routing one with a handheld machine, mind the direction of cut. OSHA’s woodworking machinery guidance is worth a skim, because a router grabbing the grain at full speed teaches respect the hard way.
- Strength runs 3/5 for panels and 4/5 as a corner reinforced with glue and nails.
- Difficulty is 2/5. Most of the time goes to setup, not skill.
- First project might be a blanket chest, bookcase backs, or drawer bottoms.
5. Dado Joint, shelves that don’t sag
A dado is a channel cut across the grain that another board drops into. If you’ve ever owned a bookcase where the shelves sat on pegs and slowly bowed under a hardcover collection, you already understand why the dado exists. It locks a shelf in place and carries the vertical load. It also makes assembly almost self-squaring. There’s a reason every built-in you’ve ever admired is full of them.
Two rules keep dados strong. Fit matters more than force, so the shelf should slide in with hand pressure and a mallet tap, never a running start. And size the dado to your actual plywood rather than the label on the rack. That so-called 3/4-inch birch plywood from the lumber yard usually measures closer to 11/16, and a loose dado is just a butt joint with extra steps. Rockler’s Learn section covers measuring and layout discipline better than any video I’ve found.
- Strength reaches 4/5 for shelving loads, which is the whole point.
- Difficulty is 2.5/5. Table saw, router, or patient chisel work all get it done.
- First project would be a bookshelf, a media console, or shop cabinets.
A sloppy dado is just a butt joint with extra steps. Fit is the whole game.
6. Tongue-and-Groove, wide panels without the drama
When you need a tabletop wider than any single board, you glue boards edge to edge, and tongue-and-groove makes that joint dramatically more forgiving. A tongue milled along one edge and a matching groove along the next registers the boards so they can’t slide sideways during glue-up and keeps the faces flush while the clamps squeeze. It also hides any small inconsistency in your edge jointing.
Do you actually need it? My honest answer is that it depends. For a glued tabletop, a well-jointed plain edge is every bit as strong, because the glue bond beats the wood around it anyway, so I skip the router bit and just joint the edges straight. But for flooring, wainscoting, and shop walls, tongue-and-groove is non-negotiable, because the joint floats with seasonal movement instead of fighting it. The Wood Whisperer’s archive has good plain-language material on how wood swells and shrinks with humidity, which is the physics behind every decision in this section.
- Strength is 4/5. The glue does the work and the tongue does the aligning.
- Difficulty is 3/5. You’ll want a router table or at least a matched bit set.
- First project means wide tabletops, porch repairs, or shop wall cladding.
7. Mortise-and-Tenon, the chair joint
Every chair, table, and door frame that has survived a century was almost certainly built with mortise-and-tenon. A rectangular peg, the tenon, cut on one piece fits into a matching hole, the mortise, in the other. It’s the strongest joint on this list for resisting racking and pull-apart, and it has carried furniture loads since the Egyptians. It is also, fairly, the one that makes beginners sweat.
So here’s the encouragement. You don’t need a $400 hollow-chisel mortiser to cut your first one. A Forstner bit in a drill press hogging out most of the mortise, a sharp chisel to square the walls, and a tenon cut at the table saw, that’s a completely legitimate shop method. Fine Woodworking’s joinery archive is the deep end if you want to drown happily in variations, wedged, drawbored, through, and blind. My first mortise-and-tenon took two hours and three pieces of practice stock. My twentieth took fifteen minutes. The learning curve is real, but it’s a hill. Not a cliff.
- Strength is 5/5, which is why antiques still stand.
- Difficulty is 4/5. Rewarding, but expect a curve measured in weekends.
- First project could be a stool, a small table, or workbench stretchers.
8. Dovetail, the joint that signs your work
Last and hardest, the dovetail. Flared tails on one board interlock with matching pins on the other, and the geometry alone resists being pulled apart. No glue, no nails, nothing but angled wood holding everything closed. That’s why drawers from two hundred years ago still work. It’s also the joint that announces a person made this, which is either thrilling or terrifying depending on your mood that day.
My advice is to learn it with pine scraps and a coping saw before you ever let a router jig near your walnut. Cutting dovetails by hand teaches your eyes and hands what the joint actually is, in a way that guiding a template never will. And when it comes time for finishing, sealing those end-grain faces so the joint doesn’t drink all your stain, Minwax’s finishing guides are the practical reference I keep open on the bench. For sharpening the chisels you’ll use to pare the pins flush, Woodworker’s Journal sharpening tutorials demystify the grit-progression question.
- Strength is 5/5 in tension because the geometry locks mechanically.
- Difficulty is 5/5 by hand. A router jig drops it to maybe 3/5.
- First project should be a small box with through dovetails, then a drawer.
What Holds It All Together: Glue and Clamps
People love asking which joint is strongest. The honest answer is that a modern PVA glue joint, the yellow stuff in the plastic bottle, is stronger than the wood around it when both surfaces are long grain and properly clamped. I’ve snapped more than one test joint trying to break it, and every time the wood fibers failed before the glue line did. That’s the quiet secret behind this whole guide. The joint’s shape mostly decides how much gluing surface you get and how well the assembly resists racking, which is why a joint can look fancy and still be weak while a humble dado quietly carries a shelf full of encyclopedias for decades. More interlock, more long-grain contact, more strength.
Clamping is where beginners quietly lose their margin. Crank down so hard that every drop of glue squeezes out and you’re gluing dust to dust. I ruined a good oak panel exactly that way, so now my rule is simple. Tighten until a small, even bead of glue squeezes out along the joint line, then stop and wipe. Give the piece a full day before stressing it, whatever the bottle claims about thirty minutes, because glue keeps gaining strength for hours after it feels dry. Patience is the one tool on this list that money can’t buy.
The Whole List at a Glance
| Joint | Strength | Difficulty | Minimum tools | Signature use |
|---|---|---|---|---|
| Butt | 2/5 | 1/5 | Saw, square, clamps, glue | Shelving, jigs, crates |
| Miter | 2/5 | 1.5/5 | Miter saw or miter box | Frames, trim, box corners |
| Half-lap | 3.5/5 | 2/5 | Saw plus chisel or dado stack | Workbench legs, trestles |
| Rabbet | 3/5 | 2/5 | Router or table saw | Box bottoms, cabinet backs |
| Dado | 4/5 | 2.5/5 | Table saw, router, or chisels | Bookshelves, case goods |
| Tongue-and-groove | 4/5 | 3/5 | Router with matched bit set | Wide panels, flooring |
| Mortise-and-tenon | 5/5 | 4/5 | Drill press, chisel, table saw | Chairs, tables, doors |
| Dovetail | 5/5 | 5/5 | Coping saw and chisels (or router jig) | Drawers, keepsake boxes |
Which Joint Should You Actually Learn First?
If I had to compress five years of weekend woodworking into one sentence, it would be this. Learn the half-lap, the dado, and the rabbet before you romanticize the dovetail. Those three cover ninety percent of what a furniture project asks of you, they build the hand skills that make the fancy joints possible later, and they let you finish projects instead of abandoning them in frustration. That last part matters more than people admit.
The dovetail and mortise-and-tenon are both worth the climb, but I think of them as the seasoning on the meal rather than the meal itself. My shop wall has a pine box with eleven practice dovetails cut into it, and I keep it there on purpose. Every wobbly pin reminds me that joinery was never a talent. It’s a set of cuts, each one learnable in an afternoon and honest for a lifetime.
Sources & next reads: Popular Woodworking and Fine Woodworking for joinery technique · This Old House and The Wood Whisperer for fundamentals · Rockler and Woodworker’s Journal how-to libraries · External links checked October 2026.
Leave a Reply