The best weekend project is one that’s actually done by Sunday night. Here’s an honest grab-bag of twenty builds across woodworking, 3D printing, and electronics — each scoped to fit inside two days, with the real time it takes, the tools it needs, and the skill it hands you on the way out.
Every maker I know has a half-finished project somewhere. Mine is a lap desk that got as far as a beautifully glued-up panel before life intervened, and it has been leaning against the wall radiating guilt for eight months now. The problem usually isn’t skill or motivation. It’s that the project was never a weekend project in the first place. It was a three-weekend project wearing a weekend project’s clothes.
So this list works differently. Every build below fits inside two days with time to spare for the thing that always eats your Saturday — a trip to the hardware store, a dull blade, a print that fails at hour five. Each entry gets an honest time estimate that includes setup and cleanup, because a project you finish and use beats a project you admire in progress photos. Each one also names the skill it teaches, since the payoff of a weekend build isn’t the object. It’s what your hands learn making it.
The twenty projects split across the three benches most hobby makers have: a wood bench, a 3D printer, and an electronics corner. Pick one from a section you’ve been neglecting. If you haven’t touched your soldering iron in a year, skip the wood and pick a circuit. The whole point of a grab-bag is that there’s no wrong door.
One honest caveat before the list. “Two days” means a real weekend — roughly twelve to sixteen working hours across Saturday and Sunday — and it assumes your tools are in working order and your materials are on hand or one quick trip away. It does not mean two days while also building a deck. Set the scope and keep it.
In this article
How to Read the Time Estimates
Honest numbers, not the optimistic kind from project plans
Every project below lists its time the way I’d tell a friend, not the way a magazine tells a reader. “Saturday afternoon” means about four to five hours of actual work. “A full weekend” means you’ll be cleaning brushes at 8 pm on Sunday and feeling great about it. If a project says it takes two hours and you’ve never done anything like it, add fifty percent and you’ll be close. Skill compounds, though, and the fifth wooden box you build takes half the time of the first, so treat the slow first attempt as tuition rather than failure.
| Weekend window | What fits | What doesn’t |
|---|---|---|
| 2-3 hours | Small prints, simple solder kits, jigs, sanding blocks | Anything involving glue drying overnight |
| Saturday afternoon | One wood build, a printed organizer, a first circuit | Case goods, multi-part prints, enclosures needing design |
| Full weekend | Stools, printer upgrades, combo wood-plus-electronics builds | Anything with a finish that needs a full cure between coats |
The table is worth memorizing because it explains most abandoned projects. People schedule a “full weekend” build into a Saturday afternoon, the glue is still wet when guests arrive, and the parts go on the guilt shelf. Match the project to the window you actually have, not the one you wish you had.
Quick Wood Builds (Saturday-Afternoon Projects)
Wood is the least forgiving material for time estimates because glue and finish set their own schedule. These five builds are chosen specifically to work around that — most are screwed or nailed, and the few that need glue can be clamped, set aside, and assembled Sunday morning.
A Wooden Toolbox Tote
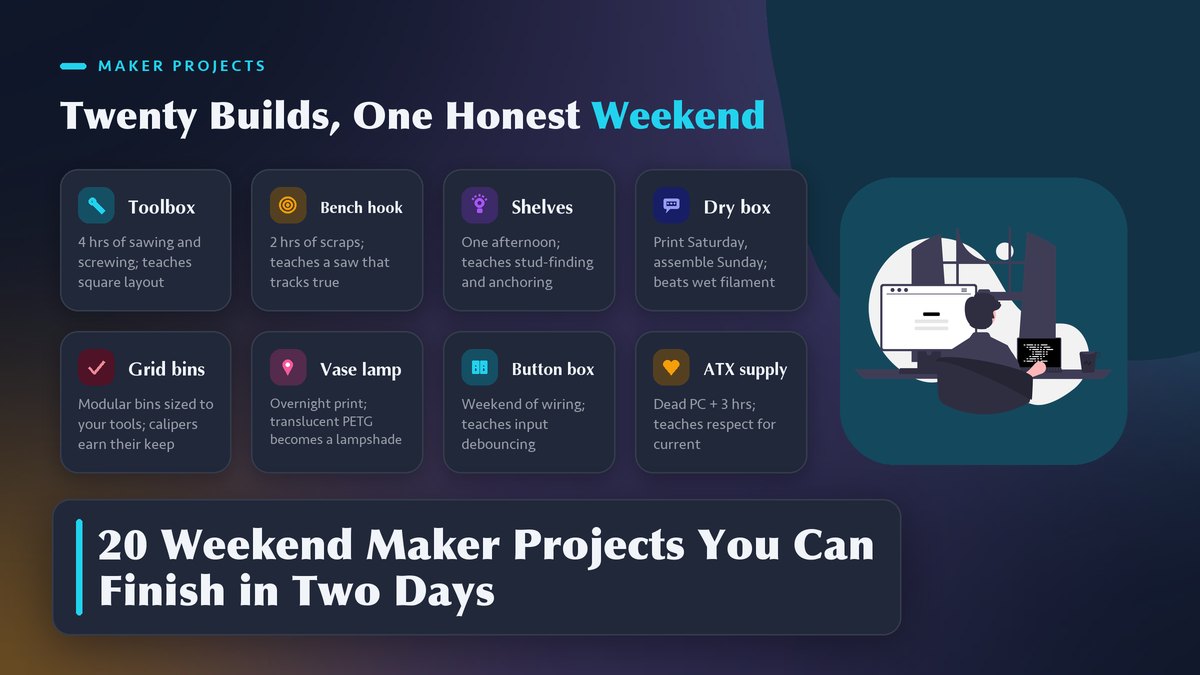
About four hours, plus a plywood sheet and a handful of screws. Cut six pieces, glue and screw the box, add a hardwood handle from a scrap of oak or a cut-down broom handle, and you’ve got the classic first project that’s been teaching joinery basics for two centuries. The skill payoff is layout and square cuts. If your crosscuts wander even a sixteenth of an inch, this box will show you exactly where, because the corners won’t close up. Pick a decent cabinet-grade plywood, not the thin big-box underlayment, and the tote will shrug off workshop knocks for decades.
A Bench Hook and a Shooting Board
Two hours, two scraps of plywood, one saw. A bench hook holds work steady while you saw; a shooting board lets you trim end grain perfectly square with a hand plane. Neither is glamorous. Both transform hand-tool work the moment they exist, and they’re the cheapest skill in this entire article — you’ll learn how a saw actually tracks and how a plane takes a shaving. Every woodworker I respect has a shop-made jig like this somewhere, usually beat to death and still in use.
A Floating Shelf Pair
Saturday afternoon, and the only tools you need are a drill, a level, and a saw. Build two cleats from 2x4s, screw them to the wall into studs, slide hollow box shelves over them, and you’re hanging level shelves by dinner. The skill here is stud-finding and wall anchoring, which is really the skill of knowing when a wall will hold weight and when it won’t. Purdue Extension’s home improvement publications cover the load basics in plain language if you’re new to hanging anything heavier than a picture frame.
A Simple Step Stool
A full day, and the gateway drug to furniture. Two stiles, two rails, two treads, some glue and screws, and a design your kids will still stand on in ten years. Use poplar or pine — the Wood Database is the reference I keep open when choosing a species, because hardness and working properties vary more than beginners expect. The skill payoff is the first time you get a leg angle right and feel the stool stop wobbling. Wobble-hunting teaches you more about square assemblies than any book.
A Magnetic Knife Strip or Tool Bar
Three hours. Mill or buy a strip of hardwood, rout a shallow channel, bed a cheap rare-earth magnet strip in epoxy, and you’ve made the kitchen gift people actually keep. The skill is routing a groove to a consistent depth, which is worth learning on a low-stakes strip before you rout a dado in an actual furniture part. If you’ve never used a router, this is the gentlest possible first project.
Weekend 3D Prints (Start Friday, Assemble Sunday)
3D printing has a scheduling trick wood doesn’t: the printer works while you don’t. The workflow that makes these fit a weekend is to start the long print Friday night or Saturday morning, do your errands and the non-printed parts in between, and assemble Sunday. All five below are well-tested designs with communities behind them — the big model-sharing sites are the first place I search, and Prusa’s knowledge base has honest troubleshooting guides when a print doesn’t go to plan.
A Filament Dry Box
The single highest-value print in this section. A sealed box with a desiccant compartment and a feed-through bearing lets hygroscopic filament like PETG and Nylon stop ruining prints. Printing the parts takes six to ten hours total; assembly Sunday takes an hour with silicone grease and a length of PTFE tube. The skill payoff is understanding humidity as a material property, which permanently upgrades your troubleshooting instincts.
A Bench Organizer for Your Tools
Four to eight hours of printing depending on size. Gridfinity-style organizers have taken over workshops for good reason — modular bins snap together, fit your specific tools, and reconfigure when the tool collection changes. The meta-skill here is measuring your tools and designing around them, even if “designing” just means remixing someone else’s model. Your calipers get their first real workout.
A Phone Stand or Headphone Hook
Two hours, one print, zero assembly. It sounds too small to count, but a first-day useful print is what hooks people on the machine. Design it yourself in a free CAD tool if you want the skill payoff of parametric modeling — change one number and every dimension follows. That’s the moment 3D printing stops being a vending machine and becomes a shop tool.
A Printed Cable Chain for Your Printer
Six to eight hours of printing in batches. Wire management chains snap together along the printer’s moving axes and stop the umbilical of cables from flexing at one point. It’s a weekend of batch printing plus an hour of routing wires, and the skill is reading how a machine moves and protecting the parts that move most.
A Vase Mode Lamp Shade or Planter
The showpiece of the section. Vase mode prints a continuous spiral wall in a single perimeter, which means a big, dramatic object in ten to fourteen hours with almost no material. Use translucent PETG with a lamp cord kit and you have a gift-grade object for under eight dollars. The skill is learning what single-wall printing can and can’t do — and when someone asks where you bought it, that’s the payoff.
Small Electronics (The Two-Day Circuit)
Electronics rewards the weekend format better than any other bench. A circuit has no drying time, no grain direction, and failures are diagnosed with a meter instead of a chisel. If you’re brand new, the Arduino project platform is the gentlest on-ramp — the Arduino Project Hub is full of builds exactly this size, with parts lists you can order in one cart.
A Temperature and Humidity Logger
Four hours with an Arduino-class board and a cheap combined sensor. Wire it on a breadboard, log to an SD card or over serial, and suddenly you know what your workshop or greenhouse actually does at 3 am. The skill is reading a sensor datasheet and understanding the difference between a device that works on the bench and one that works in the field.
A Button-Box Controller
A weekend, and the most satisfying build on this page for anyone who sim-races or plays flight sims. A handful of arcade buttons wired to a microcontroller board, mounted in a printed or wooden box, presents to your computer as a keyboard or game controller. The skill is debouncing inputs, which is the electronics rite of passage — and pressing a big red button that does exactly what you wired it to do never gets old.
An LED Sign with Diffused Channel Letters
Full weekend, and a great first combo build. Wire addressable LEDs to a microcontroller, print or cut a channel with a translucent diffuser, and write a few lines of animation code. Adafruit publishes the best beginner guides in the hobby for addressable LEDs, and their wiring diagrams are the ones I still check even after years of soldering. The skill payoff is power math — you’ll learn why LED strips need their own supply and why the data line is the easy part.
A Bench Power Supply from an ATX Supply
Three hours and one dead computer. An old ATX power supply gives you 3.3, 5, and 12 volts at serious current; add binding posts, a switch, and a fused output, and your electronics bench has a supply for free. The skill is respect for current — you’ll learn why fuses exist and why shorting a 12-volt rail across a screwdriver bit produces a permanent souvenir.
A Solder Practice Kit
Two hours, five dollars of parts, and the highest skill-per-dollar on this list. Buy a bare-bones blinker kit, a 555 timer flasher, or an RGB fader, and solder it with the methodical approach from our soldering guide. Inspect every joint under magnification. The skill is, bluntly, soldering — and it’s the skill that decides whether every other electronics project on this page is fun or miserable.
Mixed and Combo Builds (Wood + Plastic + Electrons)
The last five deliberately cross benches, because that’s where weekend projects get genuinely interesting. Each pairs a fast material with a slow one so the schedule works — print or wire while the glue sets, and sand while the firmware uploads.
A Sensor-Equipped Plant Watering Station
Full weekend. Build a simple wooden stand, print a reservoir and wicking insert, and drop in a soil-moisture sensor that lights an LED when the plant is thirsty. Three materials, one useful object, and the skill of making disciplines meet — the sensor doesn’t care about the stand, but the person watering does.
A Workshop Air-Quality Monitor
Full weekend, and the most responsible build here. A particulate sensor, a small display, and a printed enclosure that lives on the wall near your sander will show you exactly what your dust collection misses. This pairs naturally with a basic dust setup; our dust collection guide covers the airflow side. The skill is calibration and honest data — learning to trust the number, and learning when the number says you should be wearing the respirator.
A Pedal-Style Foot Switch for Your Tools
Saturday afternoon plus a print. Wire a sturdy foot pedal in series with your bench-mounted tools’ power, or make it a USB foot switch that sends a keyboard command. Build the wooden pedal body or print it — either way the skill is safe switching of mains power, which means learning about relays, ratings, and why you never switch the neutral. When in doubt about anything mains-rated, stop and read the OSHA electrical safety material before you continue.
A Kids’ Marble Run or Pegboard Marble Machine
Full weekend, and the best excuse to involve a kid in the shop. Cut tracks from wood scraps or print curved ramps, mount them on a pegboard, and iterate on the path until a marble runs the whole course without help. The skill is iterative design — version one will be boring, version four will be a machine, and that’s the lesson.
A Personalized Cutting Board with a Printed Inlay Jig
The weekend capstone. Print an inlay template or a router guide, use it to inlay a contrasting wood or epoxy stripe into a cutting board blank, and finish with food-safe oil. The board is the gift; the skill is using one discipline as a tool for another, which is the whole thesis of being a maker. Finish it properly — our finishing guide walks through the food-safe options.
Picking Your Weekend and Setting It Up to Succeed
The difference between a finished project and a guilt-shelf project is almost never the project. It’s the setup. Here’s the short version of how I run a project weekend now, after enough half-finished lap desks to know.
- Friday night, gather everything. Materials, blades, bits, filament, solder. The Saturday hardware-store run is the single biggest schedule killer in home projects, and you can eliminate it entirely with fifteen minutes of Friday prep.
- Saturday morning, do the scary step first. The irreversible cut, the first long print, the mains wiring. Mornings have the most patience in them, and the scary step always takes twice as long as estimated anyway.
- Saturday evening, set up Sunday’s win. If glue needs overnight, clamp it now. If a print needs hours, start it before bed. Sunday should open with visible progress, not a puzzle.
- Sunday afternoon, stop at “done enough.” The last five percent of polish takes half the remaining time. Ship the project, use it, and let the flaws tell you what to build next weekend.
That last point deserves its own paragraph, because it’s the one I still fight. A project that is finished and slightly imperfect teaches you something real about the next build. A project that is 95 percent perfect and never finished teaches you only how to feel guilty near a wall of lumber. Sunday at 4 pm, put the tools away, and let the thing exist.
Start with whichever section matches the bench you’ve been neglecting. If your printer’s been idle since last winter, pick the dry box. If your chisels are dull from disuse, the bench hook is calling. And if you’re brand new to all of this, pick the smallest project on the page and finish it completely, because the feeling of Sunday-night completion is the fuel every project after it runs on.
Sources & references: Arduino and the Arduino Project Hub, Adafruit, Prusa’s knowledge base, the Wood Database, Purdue Extension, and OSHA. Related reads on this site: workshop dust collection basics, soldering for beginners, how to finish wood projects, and small workshop layout ideas. Updated October 2026.