
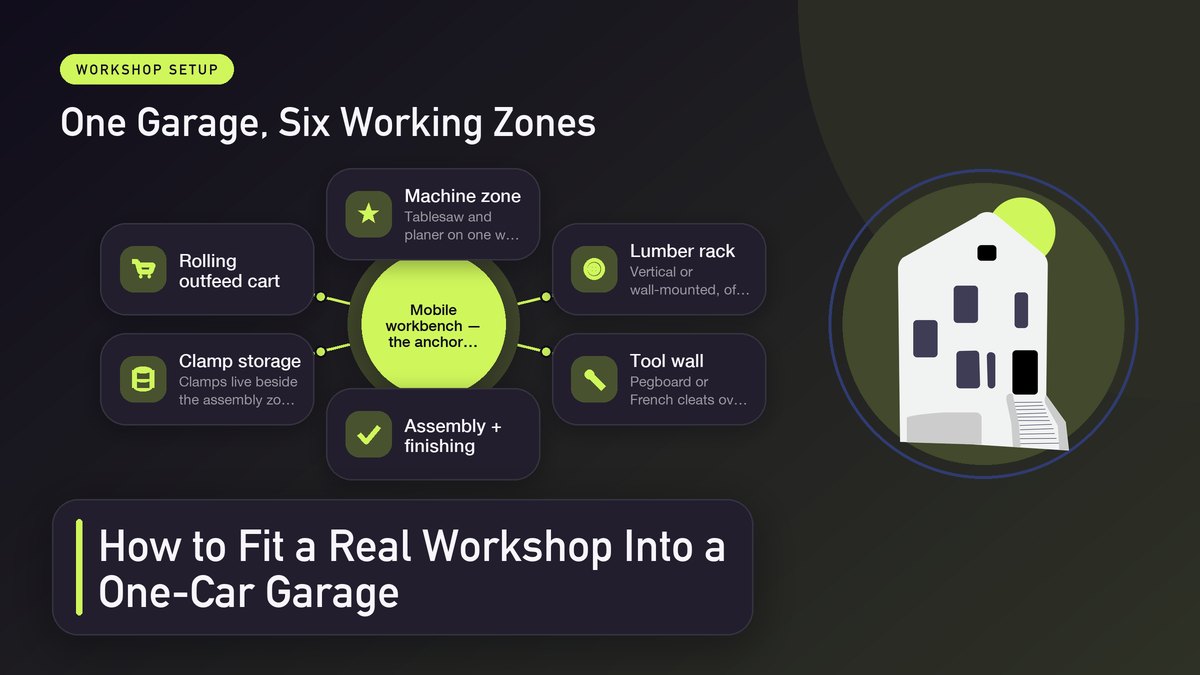
A one-car garage gives you roughly 12 by 20 feet of raw potential, about 200 square feet, which is less than half the footprint most shop magazines assume you have. The right layout, good lighting, dust control, plus one or two mobile workbenches, will turn that tight box into a shop that actually works, car included or not. This is the setup I’d build for a friend in a rented suburban garage, with real measurements, honest trade-offs, plus the mistakes I’ve already made so you can skip them.
For two years I tried to woodwork in the middle of my garage, shuffling things aside every Saturday morning like I was setting up folding chairs for a wedding. I was wrong about the room. Wheel the table saw out, trip over a tote of lumber, saw a board, then reverse the whole dance before dinner. The shop wasn’t small. My thinking was. The day I finally drew the floor plan to scale, tape measure and graph paper and all, the problem changed character. I wasn’t short on space at all. I was wasting something like sixty square feet of wall on storage for things I never used, and the floor plan showed it in a way no amount of staring at the room ever had.
Under-200-square-foot shops punish improvisation and reward intent. Every square foot does a job, or it’s theft. But the constraints force better habits than a big shop ever will, because you can’t leave the mitersaw buried under offcuts when every surface earns its footprint. The strategies below cover the four systems that make a small shop feel big: layout, lighting, dust control, mobility. Work through them in order, because they compound on each other in ways that only show up about a month in.
In this article
Measure the Box Before You Touch a Tool
Draw it to scale first — one sheet of graph paper saves weeks of regret
Pull the tape measure and write down the real dimensions, not the ones the builder advertised. A “12×20″ garage is often 11′ 4″ by 19′ 6” once the framing, the garage door tracks, and the little jog where the water heater lives all take their cut. Those inches matter when a sheet of plywood is 48 by 96 and you plan to break it down in there. Mark every immovable feature. The door and its radius when it swings up. The pedestrian door and its sweep. The electrical panel, any steps, the water heater, the attic pull-down stair if you’ve got one. Those are the walls of your puzzle, and no bench moves them.
Then decide the one question everything else hangs on. Does the car stay? If the car parks inside at night, your shop is a transformer. It must assemble and disassemble daily, which means every single choice below, from where the bench parks to how the lumber stacks, bends toward mobility and ceiling storage whether you like it or not. If the car gets evicted, you can anchor a real workbench to the wall and stop apologizing for it. I’ve done both versions, and the car-in one is harder but completely workable. Honestly it makes you a tidier maker for life, whether you want the lesson or not.
Next, tape the zones out on the actual floor with painter’s tape. Not on paper. On the floor, where your feet can feel it. Feet don’t lie. Mark the table saw position, the workbench, a 30-inch walking lane, the lumber rack. Then walk through an imaginary project. Rough boards come in the big door, get broken down at the saw, processed at the bench, finished on a rack, and leave. If your path crosses itself, the layout is wrong. Fix it with tape before you buy a single caster, because casters are the expensive way to learn the same lesson the tape was offering for free.
Three Layouts That Actually Fit
Small-shop layouts converge on three patterns, and one of them is right for your walls. Each puts the long dimension to work in a different way.
| Layout | How it works | Best when | The catch |
|---|---|---|---|
| Wall-anchored L | Bench and tool stations run along two adjoining walls, leaving the center open as one shared infeed/outfeed area | The car is gone and you can commit floor space permanently | Center space slowly fills with junk; you must stay ruthless |
| Mobile island | A heavy-duty rolling workbench parks in the middle. Everything else hugs the walls on cleats and shallow shelves | The car still sleeps here and the shop must re-form nightly | Casters and locking hardware cost real money; racking casters are a lie |
| Galley / along one wall | Every station lines up on the long wall; the rest of the garage stays car-and-lumber storage | One wall is long, clean, and near the panel; the rest is broken up by doors and the water heater | Crosscutting long stock gets awkward; you lean on hand tools and a track saw |
My own garage runs the mobile-island pattern, and the island is the whole game. Build it heavy. A 24-by-48-inch rolling bench with a real vise, locking casters, and a shelf underneath handles assembly, hand-tool work, and outfeed duty for the saw. When the car comes home, it rolls four feet to the wall and the shop vanishes. When the car leaves, it rolls back to center and I’ve got a workspace most basement shops would envy. One bench, two jobs, maybe three on a good weekend.
The wall-anchored L is what I ran before the car left, then ran again after I inherited a second parking spot. It feels luxurious because the center stays open, and it tests your discipline constantly. An open floor is a vacuum. It fills with project detritus, boxes you’re meaning to recycle, a bike. The galley layout I’ve only helped friends build, and it shines when the long wall is your only honest run of space. It pairs well with a track saw on a foam pad, since you stop moving lumber to the tool and move one light tool to the lumber instead.
Whichever pattern you pick, keep the mitersaw honest about its footprint. A mitersaw station eats 24 inches of depth for the tool and wants clear floor several feet left and right of the blade for long stock. Don’t guess this one. In a small shop that usually means a folding or flip-top stand, the kind where the saw locks vertical against the wall when idle and drops horizontal to work. A small engineering project in itself, and a satisfying one to have under your belt once the hinge stops squeaking.
Go Vertical Before You Go Wider
In a 200-square-foot shop the ceiling and walls hold roughly as much usable real estate as the floor does, and they’re free. The order of operations goes like this. Get everything off the floor, put the rarely-used things near the ceiling, and only then ask whether you still need more room. Most people never get past step one, and it shows.
- French cleats beat pegboard. A 3/4-inch plywood cleat system on one wall holds tool holders that lift off and re-hang in seconds. Pegboard hooks vibrate loose the first time you slam a car door. Ask my old pegboard where its drill went. It doesn’t know.
- Lumber lives vertical or overhead. A ceiling rack of 2x4s and conduit keeps full-length boards flat against the joists, above the door’s swing. Vertical bins near the door handle offcuts, and sheet goods lean in a wall rack, never flat on the floor where a full 32-pound panel becomes a trip hazard and a dust magnet.
- The space above the garage door is prime. Rafter shelves or a plywood deck over the door tracks hold holiday bins and jigs you use twice a year. Mind the door’s travel arc, and leave the springs and cables completely alone. No storage hangs from anything the door mechanism touches.
- Sheet goods stand, lumber lies flat. Full sheets warp when stored leaning long-term, and a warped sheet is a project ruined before it starts. A simple vertical rack, two plywood cheeks on a 2×4 base, keeps five or six sheets upright in a 14-inch footprint by the door.
The ceiling rule has one hard exception, and it’s mass. Lumber, a loaded oak rack, boxes of tile, anything heavy goes into the ceiling structure only if the joists are real 2x lumber and the load spreads across several of them. If your garage has engineered I-joists or you simply don’t know what’s up there, screw a ledger through the drywall into the top plates and hang the rack from the ledger. Drywall anchors hold pictures. They do not hold pine boards over your head while you sand beneath them.
Light It Like You Mean It
Aim for roughly 50 lumens per square foot of task lighting, on top of the ambient ceiling fixtures
Most garage shops fail at the same place. One bulb in the center of the ceiling, and a dark shadow falling exactly where the blade meets the wood. Fixing this is the cheapest upgrade on the list and the one that pays back every single session. Lighting works in layers: a ceiling layer washing the whole space so you can find things, a task layer putting hard shadow-free light on the bench and the saw, and a small inspection light, a cheap gooseneck LED, raking across finishes so you can see sanding scratches before your project teaches you about them in direct sunlight.
Now the number to hold. A workshop wants on the order of 50 to 75 lumens per square foot over task areas, which in a 200-square-foot shop means a lot more light than the single 60-watt bulb that came with the house. Four 4-foot linkable LED fixtures across the ceiling, spaced to kill the saw’s shadow, plus one dedicated fixture over the bench, transform the room for under a hundred dollars, since linear LED shop lights have made good task lighting nearly free. Pick fixtures with a color rendering index of 90 or higher at around 4000K, neutral daylight, because that combination shows wood grain and stain color the way the open garage door will, while cheap 2700K bulbs make walnut look like mud and you’ll misjudge every finish you apply under them.
Placement matters more than wattage. Angles beat watts. Put fixtures so the light comes over your shoulder while you work, never directly behind you. Over the table saw, center a fixture above and slightly ahead of the blade, so your hands cast their shadows behind the cut line instead of onto it. Over the bench, run a fixture the length of the bench and offset it toward the wall. You’ll know the lighting is right when you stop holding boards up to the window to check your work, and you’ll notice your cuts get straighter too, because you can finally see the line the whole way through. Good lighting is a sharpening upgrade that works on your eyes.
Dust Control When You Can’t Hide From It
This is the section I resisted writing because I resisted doing it, and the doing changed everything. In a one-car garage there’s no separate room for the dusty tools, so you live inside your own dust cloud, and sawdust isn’t just a mess. Wood dust is a real health hazard, and the Canadian Centre for Occupational Health and Safety’s wood dust overview lays out the respiratory risks in plain language, while OSHA’s wood dust page covers the exposure picture for exactly the kind of repetitive hobby exposure a home shop produces. Capture it at the tool, filter what’s left, and wear a respirator when the air is bad. That’s the entire strategy, honestly, and it fits in one breath, which is handy when the breath in question is full of oak dust.
Implementation runs in three layers, and budget decides where you start. Start where the money is. Layer one is a shop vacuum with a cyclone separator on the portable tools: sander, jigsaw, router. The cyclone keeps fine dust out of the vacuum’s filter, so suction stays strong. Layer two is a wall-mounted dust collector with 4-inch hose on the stationary tools like the table saw, planer, and mitersaw. Layer three, the one everybody skips, is an air filtration unit hung from the ceiling, running for an hour after you stop cutting, filtering the fine fraction no hose ever catches. That airborne dust is the part that reaches your lungs.
The honest trade-off in a small space is that a dust collector takes floor or wall space you don’t have. My compromise is a mobile collector on a cart that parks under the lumber rack and rolls to whichever tool is running, with a short flex hose on a boom arm over the table saw. It’s not the dream setup. It captures about eighty percent of what a dedicated duct run would, at a quarter of the cost and none of the floor footprint. The two rules that matter wherever you start: capture at the source beats filtering the room, and fine dust beats visible chips for danger. Both stay true every session you run a tool.
One honest admission to close this out. Denial isn’t filtration. I ran a shop with nothing but a broom and denial for a year, and the payoff for fixing it wasn’t health in the abstract. It was that finishes stopped coming out gritty, tools stopped wearing gritty, and the garage stopped smelling like a sawmill for three days after every session. (The broom is still in there. It just has a much smaller job now.) The air filter humming overhead after I’m done might be the most satisfying sound in the whole shop, if a sound can be satisfying for what it isn’t doing anymore.
Power, Circuits, and the Boring Stuff That Saves You
Electrical is the least fun section here and the one with the highest stakes, so it goes in the middle where you’ll read it anyway. A typical garage circuit is 15 or 20 amps, shared with the door opener and whatever else the builder lumped onto it. A 13-amp table saw and a 12-amp dust collector on the same circuit will trip the breaker mid-cut, which is the worst moment to lose power, both for the workpiece and for your adrenaline. If you can add a dedicated 20-amp circuit for the shop, do it. A dedicated circuit is real electrician territory, and it’s worth one professional visit.
Meanwhile, respect the boring basics. Extension cords feeding permanent tools are a code smell. A saw that lives in one place deserves a real outlet behind it, and the CPSC’s electrical safety guidance covers why worn cords and daisy-chained power strips start fires in exactly this setting. Use one good surge-protected strip per workstation, keep cords out of walking and cutting paths, and unplug tools before blade changes. The switch is not a lock. A bumped switch on a plugged-in saw has a way of finding your hand. On the broader fire picture, the U.S. Fire Administration’s fire-prevention pages are worth ten quiet minutes, especially the parts about oily rags.
That last one earns its own paragraph, because linseed oil finishes are the quiet arsonist of home shops. Rags soaked in boiled linseed oil oxidize as they dry, and piled together they can self-heat into a fire with no spark involved. Lay them flat to dry outdoors, or soak them in water and dispose of them in a sealed metal can. The chemistry is well documented on safety data sheets from finish makers like Minwax, and the one-minute habit beats explaining a garage fire to absolutely anyone.
The Mobile Workbench, Properly Built
If the mobile island is the heart of a small shop, build the heart to last. The requirements are specific. Casters first. The top should be 24 by 48 inches minimum, built from doubled 3/4-inch plywood over a 2×4 apron, so it’s flat and heavy and dead under hand pressure. And the casters are where builds go wrong. You want four-inch locking casters rated at least 100 pounds each, two fixed and two swivel, or four swivel with brakes you’ll actually set. Cheap three-inch furniture casters wobble under a vise and drift while you plane across the grain. Spend the twelve dollars per caster, because it’s the cheapest rigidity money buys and the difference shows up the first time the bench stays put under a heavy cut.
Then give the bench a second job. Mine holds the vise at one end and a T-track near the front edge for stops and hold-downs, which turns it into a 48-inch outfeed table for the saw, a sharpening station, and an assembly table, depending on where it’s parked. A shelf underneath, open rather than a cabinet, keeps big tools and the shop vacuum within one bend of the knees, and open shelves force visibility, which forces tidiness, which is the entire operating system of a small shop.
The Sunday Reset
Last thing, and it costs nothing but ten minutes. A small shop only works if it resets. Every session ends the same way. Tools back to their cleats, the island rolled to its parking spot, the floor swept, the air filter set to run an hour. Ten minutes, every time, no negotiation. Skip it twice and the shop degrades. Skip it for a month and you’re back to shuffling totes around a table saw like I was, and the garage has won again.
The reset isn’t housekeeping. It’s the mechanism that lets every other system in this article, the layout, the mobility, the lighting, the dust control, actually function together, because all of them assume a floor you can see and a path you can walk. Protect the reset the way you’d defend that 36-inch circle around the saw. Which, when you think about it, is the same protection. Room to work, kept on purpose week after week, is what this whole article reduces to in the end.
Sources & references: CCOHS wood dust guidance, OSHA wood dust overview, CPSC electrical safety, and USFA fire-prevention pages, all linked above, plus Fine Homebuilding’s shop-design archive for layout thinking. Keep exploring: The Only Woodworking Tools You Need to Get Started for what earns a place on these walls, 10 First Woodworking Projects That Teach You Real Skills for your first builds in the new space, Stain, Poly, or Oil? for finishing once the lighting shows you the grain, and Why Your Prints Warp, String, and Fail for when the 3D printer in the corner acts up. Updated October 2026.